
Tint Etching Tool Steel, Coloring Carbides and Austenite
A black and white micrograph of a tool steel shows the carbide as dark shapes, and it does not say which carbide it is or how much austenite is still sitting in the matrix. Tint etching answers both questions by putting a color on one phase and leaving the others alone, so the cementite, the alloy carbide, the ferrite and the retained austenite can be told apart in a single image. This page collects the tint etched tool steel plates printed for O1, W1, W2 and D2, the reagents that produced them, and the immersion times that go with each reagent.
Why a tool steel is tint etched rather than etched
A plain etch such as nital or picral removes metal at a rate that depends on the phase, so it shows structure through relief and contrast in grey. A tint etch works differently. It deposits a thin film or a reaction product on a specific phase, and the film produces a color by interference, so the phase that takes the film comes out colored and everything else stays grey or white. On a tool steel that matters in three places, where the carbide type has to be identified, where a segregation streak has to be confirmed, and where retained austenite has to be proved or ruled out.
The films are thin and the timing is short, which is why the reagent card below carries an immersion time for every recipe rather than a range that covers everything. A specimen left in too long takes color everywhere and the reading is lost, and a specimen pulled out too early shows nothing at all.
Coloring the cementite in an annealed tool steel
The annealed structure of a carbon or low alloy tool steel is spheroidal carbide in a ferrite matrix, and both phases are grey under a plain etch. Alkaline sodium picrate puts the color on the cementite and leaves the ferrite alone, which turns the carbide population into a countable set of brown particles. The first plate below is a high carbon tool steel etched that way, and the lighter carbides inside the segregation streak are visible against the darker ones in the surrounding metal, which is a difference in carbide composition that a plain etch does not show.
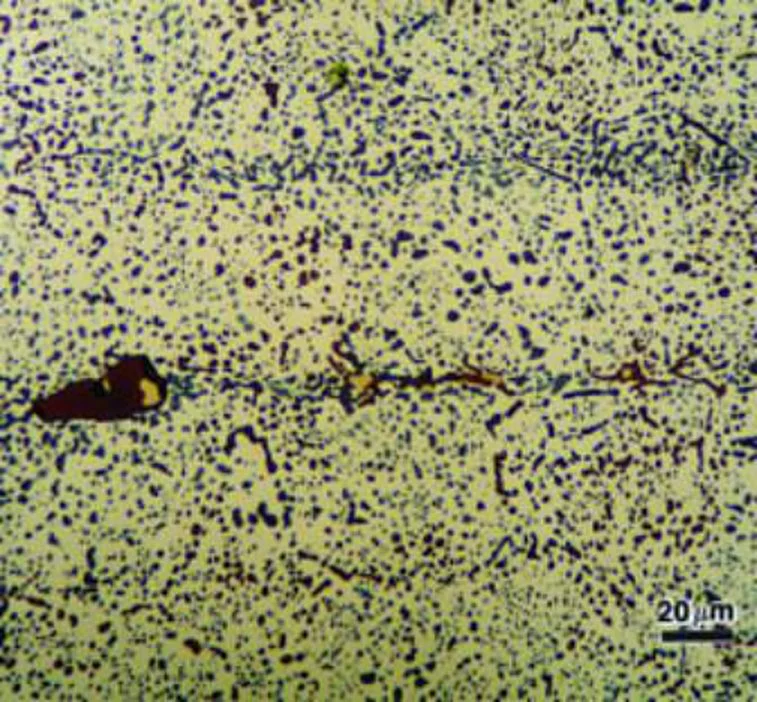
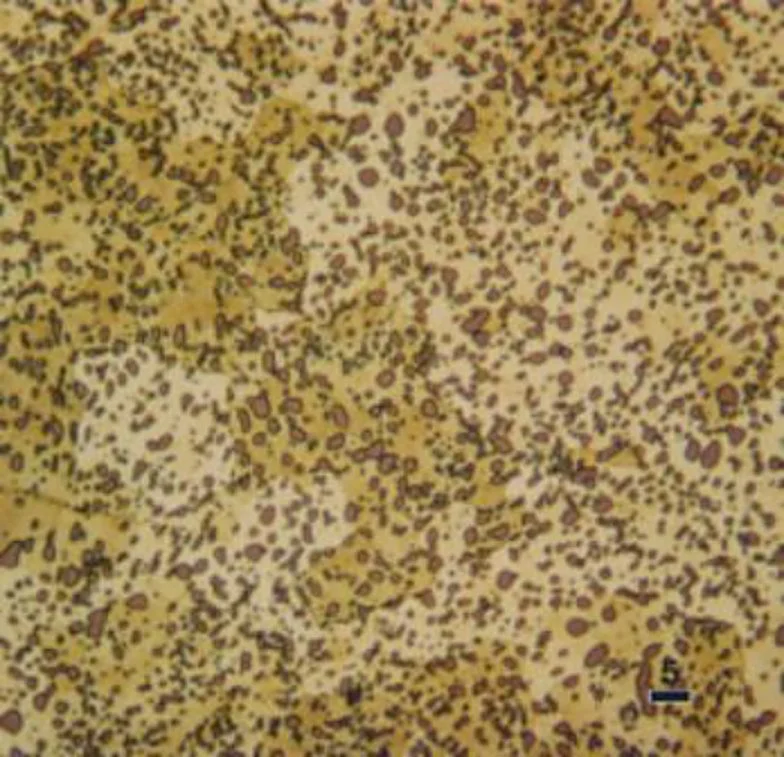
Beraha’s sodium molybdate reagent colors the same cementite a dark orange or brownish red, and on the W1 specimen below it also colored the ferrite, so the two phases are separated in the image but not in the same way. The recipe is set by the carbon level of the steel and by what has to be separated, and the table that follows gives all four versions printed for it.
| Reagent | Composition | What it colors on a tool steel |
|---|---|---|
| Klemm’s I | 50 mL cold saturated aqueous Na2S2O3 with 1 g K2S2O5 | Colors ferrite and martensite in carbon and low alloy steels and reveals segregation. Immerse up to 3 min. Works best under polarized light with a sensitive tint plate. |
| Beraha’s B0 | Stock solution of 6 mL HCl in 994 mL water, with 1 g K2S2O5 added per 100 mL of stock solution | Mixed for iron, carbon, alloy and tool steels. Immerse up to 60 s, shake strongly to start the etch and then leave the specimen motionless so the color forms. |
| Beraha’s sodium molybdate | Stock solution of 10 g Na2MoO4 · 2H2O in 1000 mL water, with NH4FHF additions and the pH adjusted per the table below | Colors cementite and phosphide yellow-orange with the ferrite left unaffected, or colors the carbides red-violet with the ferrite yellow at a higher pH. Pre-etching with nital is recommended but not required. |
| What is being colored | Addition to the stock solution | Immersion time |
|---|---|---|
| Cementite and phosphide yellow-orange, cast iron | HNO3 to bring the pH to 2.5 to 3.0 | 45 to 60 s |
| Cementite yellow-orange, low carbon steel | pH adjusted, 0.1 g NH4FHF per 100 mL of stock solution | 45 to 60 s |
| Cementite yellow-orange, medium and high carbon steel | pH adjusted, 0.3 g NH4FHF per 100 mL of stock solution | 30 to 45 s |
| Carbides red-violet and ferrite yellow, all steels | 0.5 g NH4FHF, pH adjusted to 3.0 to 3.5 | 20 to 30 s in low carbon steel, 45 to 90 s in medium and high carbon steel |
Two etchants on the same W2 specimen
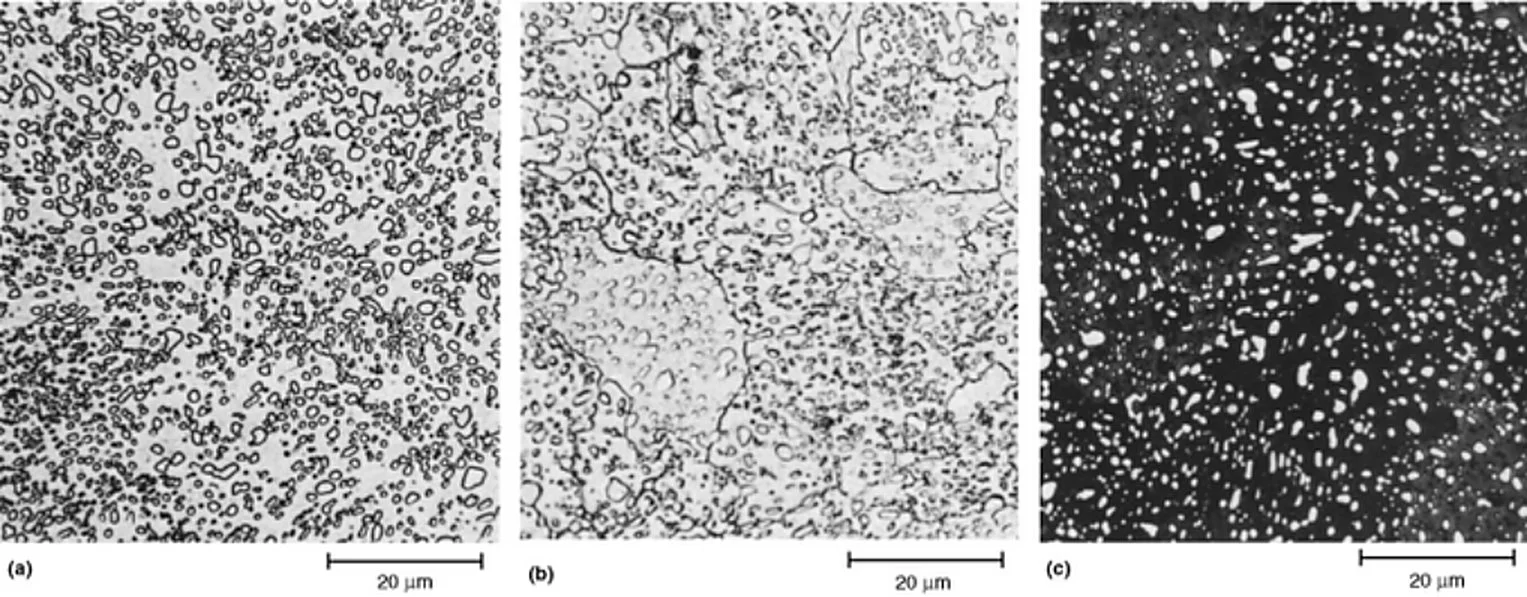
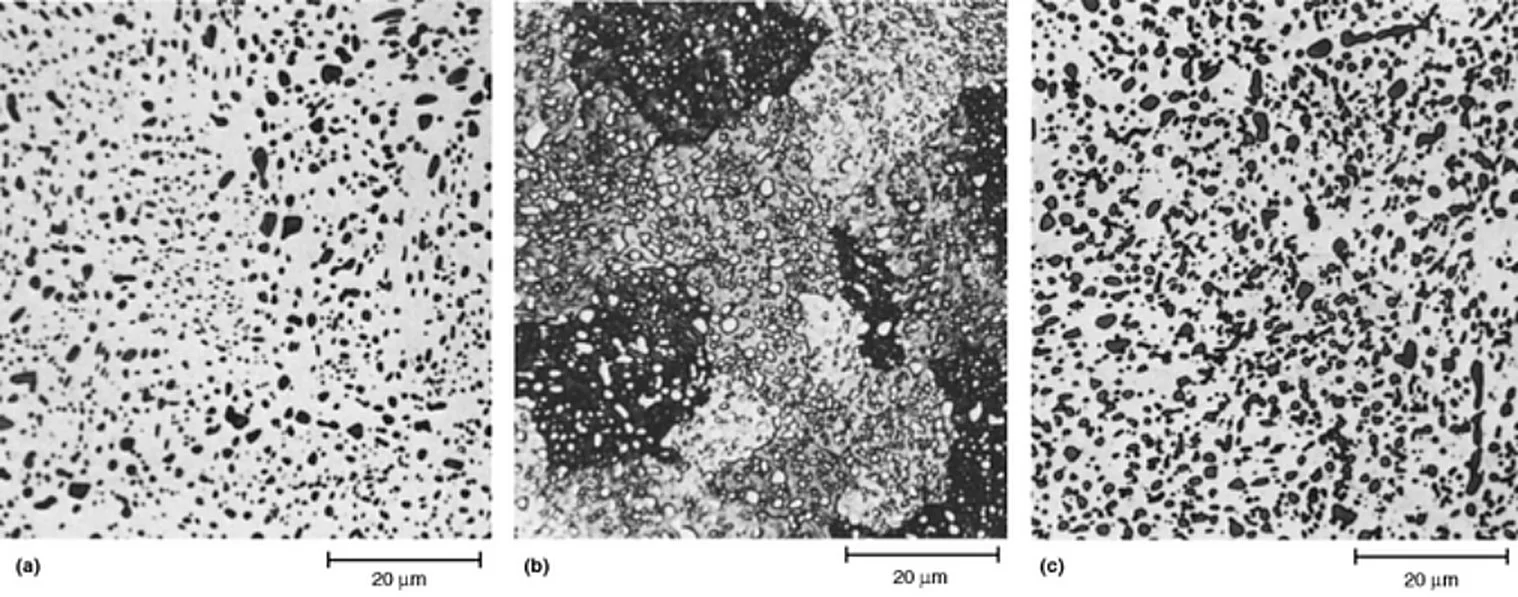
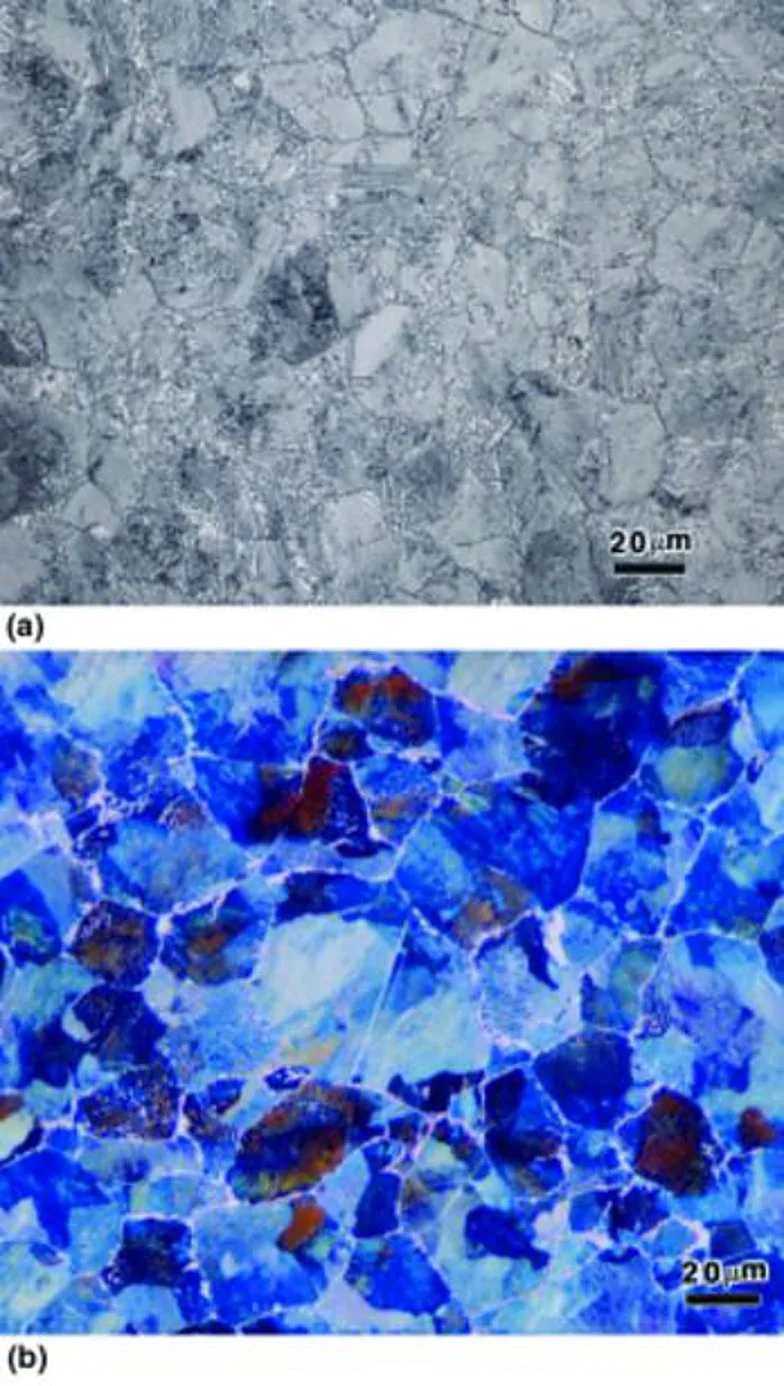
The clearest demonstration of what a reagent adds is the same specimen under successive etchants. The two sets below are W2 spheroidize annealed, and between them the same field is shown under picral, nital, Klemm’s I, boiling alkaline sodium picrate, Beraha’s thiosulfate metabisulfite reagent and Beraha’s sodium molybdate reagent. Picral outlines the cementite and leaves the ferrite flat, nital reveals the ferrite grain boundaries, and Klemm’s I colors whole ferrite grains so that individual grains can be told apart. The sodium picrate and the sodium molybdate both color the cementite, and the metabisulfite reagent colors the ferrite over a wider color range than Klemm’s I.
Revealing cementite films that a plain etch misses
Cementite that has precipitated as a film on a grain boundary is the structure that is easiest to miss and hardest to live with, because it is a cracking path in a finished tool. Picral will show the Widmanstätten cementite inside the grains of an as-rolled high carbon grade and it will not show the films on the boundaries. Klemm’s I colors the ferrite and leaves the cementite as a film of a different color, so both the intergranular and the intragranular cementite appear in the same image, and the specimen is read under polarized light with a sensitive tint plate. The as-rolled water hardening grade below is the example, and the same reagent is the one to use when a spheroidize anneal has to be checked for a carbide network that did not break up.
Making retained austenite visible
Retained austenite is invisible under a plain etch until a substantial amount is present, generally more than 10%. A second route to showing it on a polished specimen is a thin film of zinc selenide, vapor deposited onto the surface after the specimen has been etched. The film produces colors by interference and it separates all three phases at once, with the carbide coming out dark violet, the retained austenite white and the martensite dark. The plate below is a quenched and tempered D2 specimen treated that way, and it is the check to use when a heat treat shop and a customer disagree about whether a batch was overaustenitized.
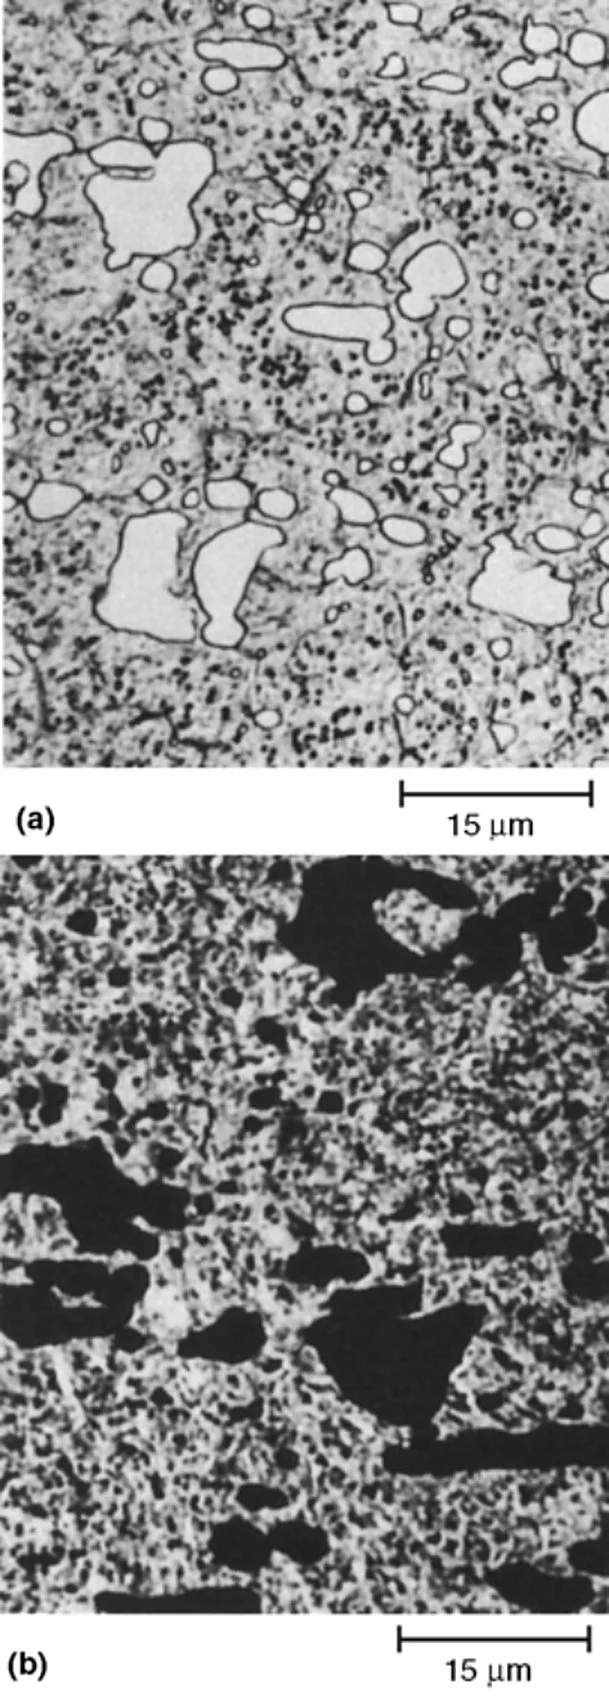
The alternative to a coating is a temper at a controlled temperature in air, which grows an oxide film on the surface instead. Heat tinting after a nital etch at 540 °C for 5 minutes was used to bring out the retained austenite in the D2 specimen on the tool steel microstructure page. Heat tinting temperatures are set per alloy and kept low, because a specimen held too hot takes color everywhere and stops being selective.
Where tint etching fits in a quality check
A tint etch is not a routine shop test. It is the method to reach for when the question is the type of carbide in a grade substitution, whether a segregation streak from a bar carries a different carbide population, whether a spheroidize anneal left a cementite network in place, or how much retained austenite survived the quench. The plain etchants and the preparation practice for the same specimens are set out on the tool steel microstructure page, and the carbide each color stands for is listed on the carbide types and hardness page.
Compiled from ASM Handbook, Volume 9, Metallography and Microstructures, the articles Metallographic Techniques for Tool Steels and Color Metallography (G.F. Vander Voort), ASM International, 2004. Plates Fig. 5, 6 and 9 come from the tool steel article and Fig. 19, 26 and 48 from the colour metallography article; the reagent tables reproduce Tables 1, 2 and 5 of the colour metallography article, with the sodium molybdate recipes restructured from the printed two column layout into one row per recipe, values unchanged. Every caption was read from the searchable text layer of the file and checked against the printed plate, and each plate was cropped from the file at 1.5 times its printed pixel width. The plates and reagents are a reference summary of published practice rather than an Aobo Steel specification, so confirm the reagent, the pH and the immersion time on a specimen of the actual grade before the method is written into an inspection sheet.